Menus
There are three types of menus that can be supported when developing a Namespace Extension:
- Folder Context Menu: This menu is shown when an end user right-clicks on a folder view, but not on a Shell item. This is not to be confused with the menu shown when the user clicks on a Shell folder.
- Item Context Menu: This menu is show when an end user right-clicks on a Shell item (item or folder). Note that this menu can be shown in Explorer's left tree view or in the list of Shell items (the view).
- "New" Item Menu: This menu is the standard Windows "New" menu. It can be a submenu of the folder context menu (its display text is "New"). This menu allows end users to create new items from the Shell, as opposed to creating new items from an application (e.g., using Common Dialogs like Save).
- "Send To" Item Menu: This menu is the standard Windows "Send to" menu. It can be a submenu of the folder context menu.
Folder Context Menu
The following is an example of a folder context menu in the Registry Folder sample. Note that the user right-clicked the mouse anywhere in the white area of the folder view, but did not click on one of the five folders:
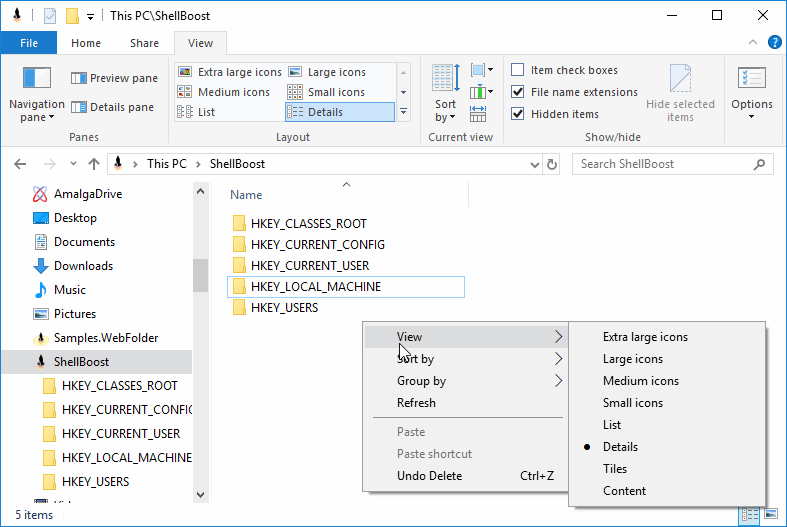
In this case, the menu is the standard Windows 10 Shell menu. The following is another example in which a "New" item with a submenu was added by the Namespace Extension (because this is the Registry Folder sample, it is meant to mimic "Regedit" behavior):
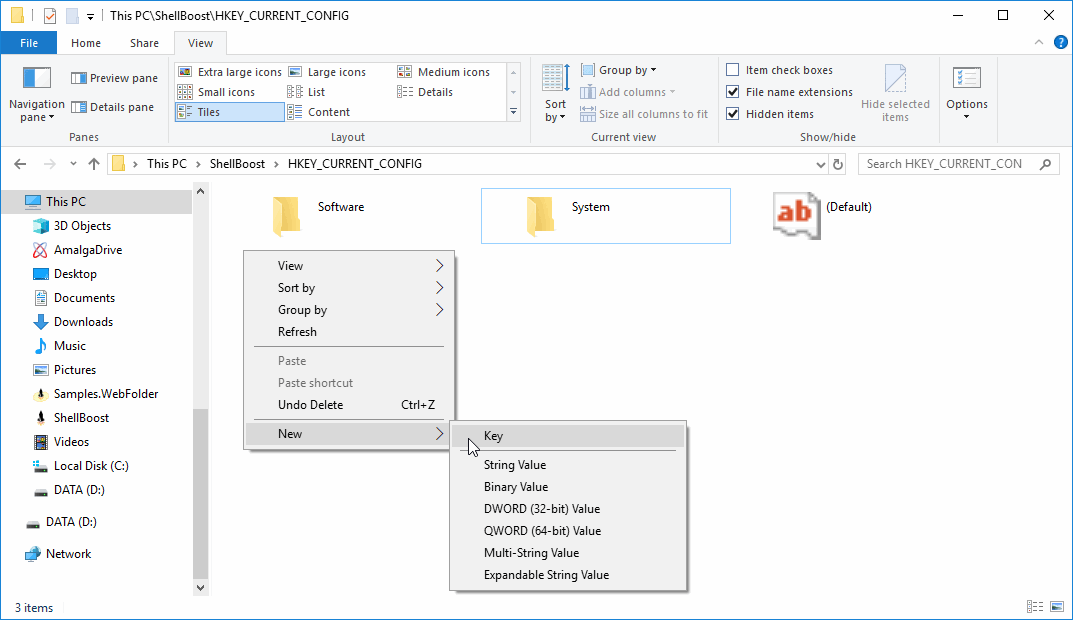
The following code adds this submenu:
// override ShellFolder's class MergeContextMenu method.
// existingMenu contains the menu as it was already prepared by the shell.
protected override void MergeContextMenu(ShellFolder folder, IReadOnlyList<ShellItem> items, ShellMenu existingMenu, ShellMenu appendMenu)
{
    ...
    if (items.Count == 1 && !items[0].IsFolder)
    {
        // this is one shell item, do something else
    }
    else
    {
        // tags are a placeholder for anything. We use them to remember what the real command behind the menu item is
        if (existingMenu.Items.FirstOrDefault(i => i.Text == "New") == null)
        {
            var newItem = new ShellMenuItem(appendMenu, "New");
            appendMenu.Items.Add(newItem);

            newItem.Items.Add(new ShellMenuItem(appendMenu, "Key") { Tag = MenuCommand.NewKey });
            newItem.Items.Add(new ShellMenuSeparatorItem());
            newItem.Items.Add(new ShellMenuItem(appendMenu, "String Value") { Tag = MenuCommand.NewValueString });
            newItem.Items.Add(new ShellMenuItem(appendMenu, "Binary Value") { Tag = MenuCommand.NewValueBinary });
            newItem.Items.Add(new ShellMenuItem(appendMenu, "DWORD (32-bit) Value") { Tag = MenuCommand.NewValueDWord });
            newItem.Items.Add(new ShellMenuItem(appendMenu, "QWORD (64-bit) Value") { Tag = MenuCommand.NewValueQWord });
            newItem.Items.Add(new ShellMenuItem(appendMenu, "Multi-String Value") { Tag = MenuCommand.NewValueMultiString });
            newItem.Items.Add(new ShellMenuItem(appendMenu, "Expandable String Value") { Tag = MenuCommand.NewValueExpandString });
        }
    }
    ...
}
Note: Starting with Windows 11, the root folder context menu will not show the complete context menu like previous versions of Windows did. Instead, all custom items will be placed in a special "Show more options" menu item that opens a submenu. This is expected. The only solution is to use a static verb (as opposed to dynamic verbs; i.e., IContextMenu Shell extensions), because this is the direction Microsoft is taking for the future. For more information, see this article: Extending the Context Menu and Share Dialog in Windows 11
Item Context Menu
The list of items and subitems in a Shell item (item or folder) context menu is the result of various combined operations from the Shell and third-party modules installed in the system (including the Namespace Extension that contains the item).
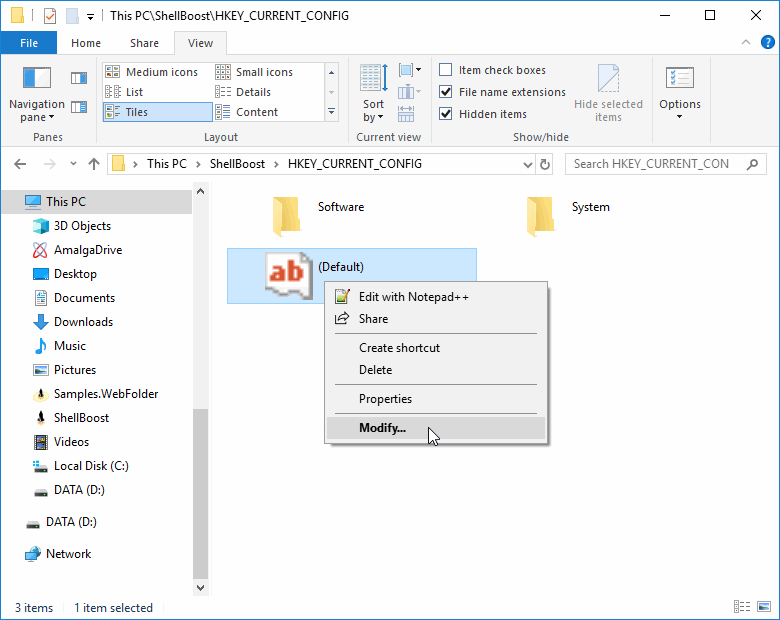
This is how you can add a "Modify" menu item to a Shell item (not a folder) in your Namespace Extension:
// override ShellFolder's class MergeContextMenu method.
// existingMenu contains the menu as it was already prepared by the shell.
protected override void MergeContextMenu(ShellFolder folder, IReadOnlyList<ShellItem> items, ShellMenu existingMenu, ShellMenu appendMenu)
{
    ...
    // if there is only one shell item selected and it's not a folder
    if (items.Count == 1 && !items[0].IsFolder)
    {
        var modifyItem = new ShellMenuItem(appendMenu, "Modify...");
        modifyItem.Tag = MenuCommand.Modify;
        modifyItem.IsDefault = true;
        appendMenu.Items.Add(modifyItem);
    }
    ...
}
Menu Items Bitmap
Added menu items may have an associated bitmap. To set a menu item bitmap, set its BitmapPath property to a file path that points to the bitmap, like this:
var item = new ShellMenuItem(appendMenu, "My Menu Item");
item.BitmapPath = @"c:\myPath\myBitmap.png";
Note: For a context menu to support transparency, it is
recommended to use an 8-bit depth (using a palette of 256 colors) bitmap, not a
32-bit depth (full ARGB) bitmap, even with a .png, for example. You can build
and distribute these images yourself, or you can use a
CBFS Shell-provided OctreeQuantizer utility class that converts ARGB
bitmap to 256 colors bitmaps. For example, you could use the following code:
public string GetMenuIconBitmapPathFromResource()
{
       // come up with some cache path so we don't rewrite a file each time
       var cachePath = Path.Combine(Path.GetTempPath(), "some unique identifier.png");
       if (!IOUtilities.FileExists(cachePath))
       {
             // for example, get an embedded resource bitmap from an assembly
             using (var stream = Assembly.GetExecutingAssembly().GetManifestResourceStream("myBitmap.png"))
             {
                    using (var bmp = Image.FromStream(stream)) // load the bitmap from the assembly resource
                    {
                           // resize to 16 x 16 (context menu standard size), still ARGB (32bits) using a CBFS Shell-provided utility
                           using (var resized = ImageUtilities.ResizeImage(bmp, 16, 16))
                           {
                                  // the Shell's context menu doesn't like full ARGB images, convert to paletted 256 colors (8 bits)
                                  using (var bmp256 = new OctreeQuantizer(BitDepth.Bits8).Quantize(resized))
                                  {
                                        bmp256.Save(cachePath);
                                  }
                           }
                    }
             }
       }
       return cachePath;
}
Unwanted Menu Items
As a Shell Namespace Extension developer, you will not own everything that's displayed in this menu, especially if the item is a physical Shell item. For example, if you installed the renowned Notepad++ application and asked for Shell integration, Notepad++ setup will add the "Edit with Notepad++" menu item to any Shell item, including items that are fully virtual (clicking on this item will do nothing as the Shell item in this example does not support virtual content).
When overriding MergeContextMenu, CBFS Shell will extract for you the existing menu as it has been prepared when the Shell called CBFS Shell to merge new items. Then, you may remove existing items that you don't want. To do remove items, add the value of the Id property of the corresponding item(s) to the collection in the RemoveIds property of the ShellMenu class. You also may use the RemoveIdsWhere utility method as shown in the next example. Note, however, that in the case of Notepad++, this approach won't work: for some reason, the "Edit with Notepad++" menu item is added after the MergeContextMenu call.
In this case, to remove such a menu item, you can override
the MergeContextMenuTop method, and remove, for example, all items
containing the "Notepad++" string:
protected override void MergeContextMenuTop(ShellFolder folder, IReadOnlyList<ShellItem> items, ShellMenu existingMenu, ShellMenu appendMenu)
{
    // many standard Shell menu items can be determined using their "verb" property
    // for example, "properties" for the Properties menu item, "delete" for the Delete menu item, etc...
    // but other third parties can only be determined by their display name.
    appendMenu.RemoveIdsWhere(existingMenu.AllItems, i => i.DisplayText?.IndexOf("Notepad++", StringComparison.OrdinalIgnoreCase) >= 0);
}
Another solution is to fully implement your own custom menu. You can do this if you override the ShowDefaultContextMenu method, like this:
protected override bool ShowDefaultContextMenu(IntPtr hwndOwner, IReadOnlyList<ShellItem> items) => false;
In this case, you will lose the default menu items that the Shell creates, such as "Pin to taskbar", "Pin to Start", "Pin to Quick Access", "Open in new window", "Create Shortcut", "Share", "Delete", "Copy", "Cut", "Paste", "Delete", "Properties", and others. If you still need these menu items, you will have to add your own items for the same purpose. In some cases, however, this is not always possible because some items and their corresponding actions are not documented.
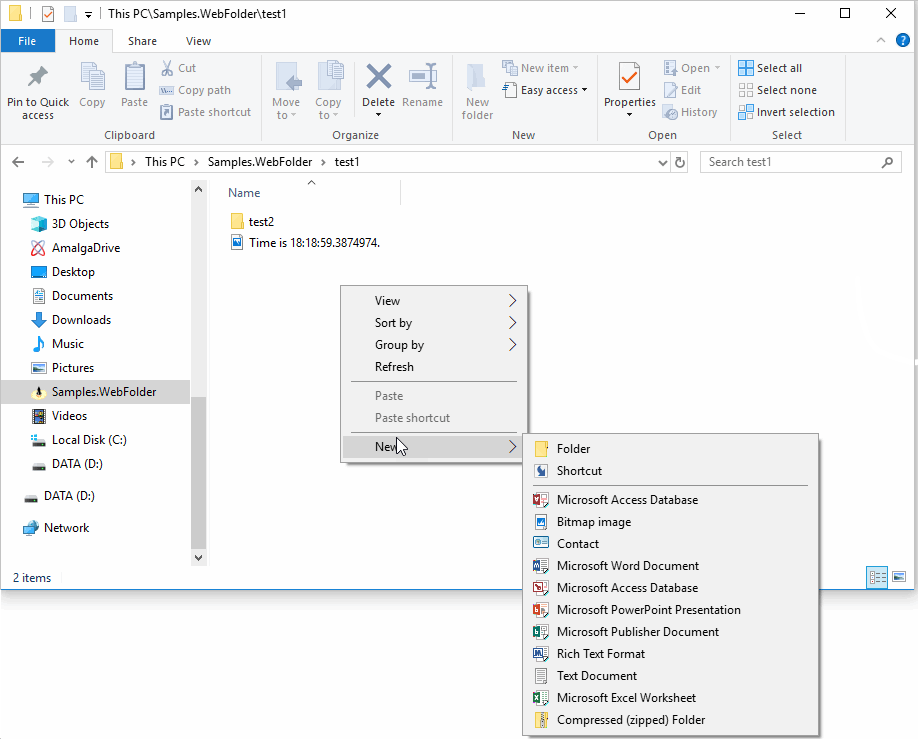
"New Item" Menu
The "New Item" menu is a submenu of a folder context menu that appears when right-clicking on the folder's view. This appears anywhere outside a shell item:

This menu is built entirely by the Windows Shell, and its contents depend on the applications installed in the system.
Namespace Extensions developed using CBFS Shell can support this New Item menu. It's automatic when the Shell folder in the view is a physical Shell item (it's mapped to a real physical directory). You can, however, prevent this menu from appearing if you set a ShellFolder instance's AddNewMenuTemplatePath property to null.
For fully virtual Shell folders, this menu will not appear.
You can add it manually to the folder context menu with the following code
(demonstrated in the Web Folder sample):
protected override void MergeContextMenu(ShellFolder folder, IReadOnlyList<ShellItem> items, ShellMenu existingMenu, ShellMenu appendMenu)
{
    // add an invoke handler
    appendMenu.AddInvokeItemHandler(OnShellMenuItemInvoke);

    // because we don't rely on the filesystem, we won't have the "new" menu automatically set for us;
    // so we must build our own menu from the standard one.
    // Fortunately, there is a helper for that
    appendMenu.MergeNewMenu();
}

private void OnShellMenuItemInvoke(object sender, ShellMenuInvokeEventArgs e)
{
    // here, e.Verb contains either:
    // * the file extension of the new file type chosen (for example ".txt")
    // * the "newfolder" string (new folder)
    // * the "newlink" string (new shortcut)
    // TODO: implement logic
}
As you can see, this appears the same way as it does for physical Shell folders:
Of course, because the folder is virtual, you will need to code whatever creating a new item in this context constitutes.
"Send To" Menu
The "Send To" menu is a submenu of a Shell item's Context menu that can appear when the user right-clicks on the item.
By default, it will not appear, but you can add it with the following code:
protected override void MergeContextMenu(ShellFolder folder, IReadOnlyList<ShellItem> items, ShellMenu existingMenu, ShellMenu appendMenu)
{
    appendMenu.Items.Add(new ShellMenuSendToItem());
}
The Send To menu and its submenu items will be added to the Context menu. The content and position of the Send To menu is automatically decided by the Shell. When the user selects one of the submenu's items, the system will try to Copy/Paste or Drag & Drop the currently selected item(s) or access its/their stream.
Following is what the "Send To" menu shows in the case of the Registry Folder sample, which uses virtual Shell items:
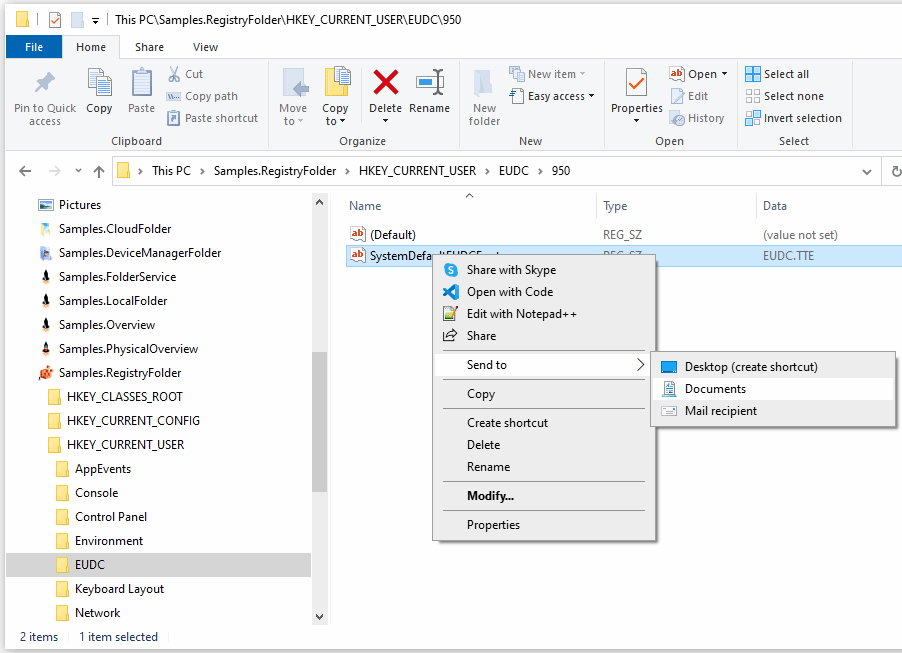
Note: The "Mail recipient" command, although displayed, by default cannot understand the sample virtual items.